Even the most seasoned home cooks often overlook one crucial aspect of kitchen maintenance: regular toaster cleaning. It’s easy to forget about the hidden world of crumbs accumulating beneath your daily toast, especially if your toaster lacks a convenient removable crumb tray. But fear not! As a toaster technician with over a decade of hands-on experience, I understand the unique challenges these models present. Keeping your toaster clean isn’t just about aesthetics; it’s vital for safety, efficiency, and ensuring your toast always tastes its best. This guide will walk you through effective, safe methods to banish those stubborn crumbs, transforming a seemingly daunting task into a simple routine.
The Absolute First Step: Safety Over Everything Else
Before you even think about dislodging a single crumb, the most critical action you can take is to unplug your toaster. This golden rule of toaster maintenance cannot be overstated. An unplugged and completely cooled appliance eliminates any risk of electric shock or accidental activation of heating elements while you’re working inside. Rushing this step can lead to serious hazards, so always ensure the toaster is cool to the touch and completely disconnected from its power source. Safety truly comes first when dealing with any electrical appliance.
The “No Tray” Shake-Out Method: Your Initial Crumb Evacuation
For toasters without a removable crumb tray, the classic “upside-down shake” is your primary method for dislodging loose debris. While some advanced toaster models caution against vigorous shaking due to sensitive internal components, for older or simpler designs, a gentle yet firm shake is perfectly acceptable.
To perform this, move your unplugged and cooled toaster to a designated crumb-collection area, such as directly over a trash can, a large sink, or a newspaper-covered counter. Carefully invert the toaster and gently shake it from side to side. You’ll likely be surprised by the volume of crumbs that tumble out! Repeat this a few times, gently tapping the sides to encourage any clingy bits to fall. Remember, the goal is to dislodge loose crumbs, not to dislodge internal wiring, so always prioritize gentleness over brute force.
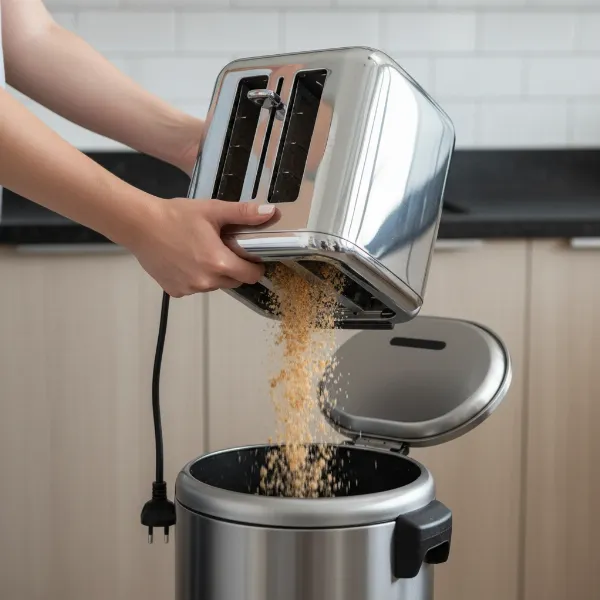 Person carefully inverting a toaster without a crumb tray over a trash can to remove crumbs.
Essential Tools for Deeper Toaster Cleaning
Once the initial shake-out is complete, it’s time to tackle the more stubborn crumbs clinging to the interior. You’ll need a few simple tools that can reach into the tight spaces without damaging heating elements.
The Power of Soft Brushes
|
Our Picks for the Best Toaster in 2026
As an Amazon Associate I earn from qualifying purchases.
|
||
| Num | Product | Action |
|---|---|---|
| 1 | Elite Gourmet ECT1027B Cool Touch Toaster with 6 Temperature Settings & Extra Wide 1.25" Slots for Bagels, Waffles, Specialty Breads, Puff Pastry, Snacks, ETL Certified, 2 Slices, Black |

|
| 2 | Amazon Basics 2 Slice Toaster, With 6 Browning Settings, Extra Wide Slots For Bagels and Special Breads, Removable Easy-to-Clean Crumb Tray, Cancel/Defrost/Bagel Buttons, 900W, Black & Silver |
|
| 3 | bella 2 Slice Slim Toaster, Fits-anywhere™ Kitchenware, 6 Setting Shade Control with Reheat & Cancel Buttons, Fits sourdough, 10” Long Slot, Anti Jam & Auto Shutoff, 900 Watt, Plum |
|
| 4 | bella 2 Slice Slim Toaster, Fits-anywhere™ Kitchenware, 6 Setting Shade Control with Reheat & Cancel Buttons, Fits sourdough, 10” Long Slot, Anti Jam & Auto Shutoff, 900 Watt, Blossom |
|
| 5 | bella 2 Slice Slim Toaster, Fits-anywhere™ Kitchenware, 6 Setting Shade Control with Reheat & Cancel Buttons, Fits Sourdough, 10” Long Slot, Anti Jam & Auto Shutoff, 900 Watt, Surf |
|
| 6 | STRING SET BASS STD 45w 55w 75w 105w |
|
| 7 | bella 2 Slice Slim Toaster, Fits-anywhere™ Kitchenware, 6 Setting Shade Control with Reheat & Cancel Buttons, Fits sourdough, 10” Long Slot, Anti Jam & Auto Shutoff, 900 Watt, Oatmilk |
|
| 8 | Touch Screen Toaster - 4 Slice, 2 Extra Long Slots - 5 Bread Types and 6 Browning Levels - Defrost, Reheat, Favorite, & Single Slot Modes - For Toast, Bagels, & Waffles – White |
|
| 9 | bella 2 Slice Slim Toaster, Fits-anywhere™ Kitchenware, 6 Setting Shade Control with Reheat & Cancel Buttons, Fits Sourdough, 10” Long Slot, Anti Jam & Auto Shutoff, 900 Watt, Seaglass |
|
| 10 | KEYWIND VTG RIC DELUXE LONG SE |
|
A soft-bristled brush is your best friend here. A pastry brush, a clean, dedicated old toothbrush, or a small, thin paintbrush are ideal. Gently insert the brush into the toaster slots and use a soft sweeping motion to brush crumbs down towards the bottom opening. Work systematically, focusing on each slot and around the heating elements. Be careful not to press too hard or scrape the elements, as they are fragile. The goal is to dislodge, not to scrub aggressively.
Compressed Air for the Finer Particles
For those hard-to-reach nooks and crannies, or to give the interior a final sweep, a can of compressed air can be incredibly effective. Hold the can upright and use short, controlled bursts to blow fine crumbs and dust out of the toaster. Again, direct the expelled crumbs towards your trash receptacle. Always ensure you’re using compressed air designed for electronics or general cleaning, and follow the manufacturer’s safety instructions.
What to Absolutely Avoid
Never use metal utensils, knives, or any other sharp or conductive objects to try and remove crumbs from inside your toaster. This can not only damage the heating elements and internal wiring but also poses a severe risk of electric shock if the toaster is accidentally plugged in or if residual current is present. Stick to non-metallic, soft-bristled tools for safety and to preserve your appliance.
Tackling Stubborn and Baked-On Debris
Sometimes, crumbs aren’t just loose; they’re baked onto the interior surfaces or have formed a sticky residue. These require a slightly different approach, focusing on loosening the grime without introducing excessive moisture.
The Baking Soda Paste Method
For particularly stubborn, baked-on spots, a simple baking soda paste can work wonders. Mix equal parts baking soda and water in a small bowl to create a thick paste. Apply a small amount of this paste to a clean, damp cloth or the bristles of your old toothbrush. Gently scrub the affected areas, being extremely careful to avoid the heating elements. Baking soda is a mild abrasive that can help break down burnt residue.
After scrubbing, use a separate clean, damp cloth to wipe away the paste and loosened grime. Ensure the cloth is only slightly damp, not soaking wet, to prevent water from dripping into the toaster’s electrical components. Follow up with a dry cloth to thoroughly dry the cleaned areas. Allow the toaster to air dry completely for several hours (or even overnight) before plugging it back in and using it.
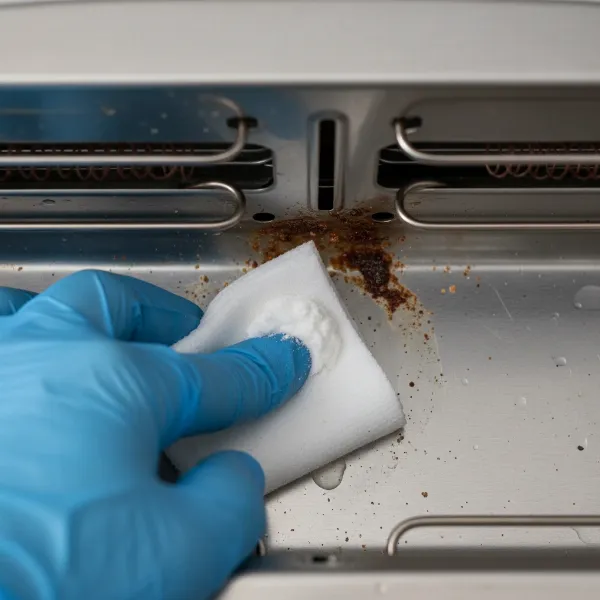 Hands gently cleaning baked-on residue inside a toaster with a baking soda paste on a cloth.
Exterior Cleaning and Finishing Touches
Once the interior is sparkling, don’t forget the outside! The exterior of your toaster can accumulate grease, fingerprints, and general kitchen grime.
Wiping Down the Casing
For plastic or painted exteriors, a damp cloth with a drop of mild dish soap is usually sufficient. Wipe down the entire surface, paying attention to levers and buttons. For stainless steel toasters, a dedicated stainless steel cleaner or a solution of vinegar and water can help remove streaks and restore shine. Always wipe in the direction of the grain for stainless steel.
Drying Thoroughly
After cleaning the exterior, use a clean, dry cloth to wipe it thoroughly. Any lingering moisture can leave water spots or, more importantly, potentially seep into the toaster’s internal components. A gleaming, dry exterior is the perfect complement to a crumb-free interior.
Why Regular Toaster Cleaning Matters More Than You Think
Cleaning your toaster isn’t just a chore; it’s an essential part of maintaining a safe and efficient kitchen.
Fire Prevention
Crumbs left in a toaster can burn, smoke, and even ignite, posing a significant fire hazard. These small, dry particles are highly flammable and can quickly overheat, especially when close to the heating elements. Regular cleaning drastically reduces this risk, safeguarding your home and family.
Enhanced Performance and Taste
A buildup of crumbs can interfere with your toaster’s performance, leading to uneven toasting or a distinct burnt smell and taste that permeates your bread. Removing debris ensures consistent heat distribution and prevents unwanted flavors from tainting your toast. A clean toaster simply makes better toast.
Appliance Longevity
Just like any other appliance, proper maintenance extends the lifespan of your toaster. Preventing excessive crumb buildup reduces strain on its components, helps it operate more efficiently, and can save you money on replacements in the long run.
Toaster Care & Maintenance Checklist
To keep your toaster in peak condition, integrate these simple habits into your kitchen routine:
- Weekly Crumb Check: Even without a tray, a quick upside-down shake weekly or bi-weekly can prevent major buildup.
- Monthly Deep Clean: Dedicate time each month for a more thorough brush-and-wipe interior and exterior cleaning.
- Unplug Always: Make it a non-negotiable rule to unplug your toaster before any cleaning activity.
- Avoid Overfilling: Try not to force oversized bread slices into the toaster, as this can create more crumbs and burnt bits.
- Use the Right Tools: Stick to soft brushes and cloths, avoiding anything metallic or abrasive that could cause damage.
“A clean toaster is not just a cleaner kitchen; it’s a safer kitchen. The peace of mind from knowing you’ve eliminated a potential fire risk is invaluable.” – Sarah Jenkins, Home Appliance Safety Expert
Conclusion
Cleaning a toaster without a crumb tray might seem like a trickier task, but with the right approach and tools, it’s entirely manageable. By prioritizing safety through unplugging, employing the gentle shake-out method, and utilizing soft brushes and baking soda paste for deeper cleaning, you can effectively eliminate crumb buildup. Regular maintenance not only prevents potential fire hazards and extends your toaster’s life but also ensures every slice of toast is perfectly golden and delicious. Isn’t a little effort worth it for that perfect crunch every morning?
Frequently Asked Questions
Is it truly safe to turn my toaster upside down to remove crumbs?
Yes, for most older or simpler toasters without a removable tray, gently turning it upside down and shaking it is a safe and effective way to remove loose crumbs, provided the toaster is unplugged and cool. Always avoid aggressive shaking that could damage internal elements.
What if crumbs are stuck firmly on the heating elements?
Avoid directly touching the heating elements with any tool. Instead, use a very soft-bristled brush (like a pastry brush) to gently dislodge crumbs from around the elements, guiding them towards the bottom opening. For baked-on residue near elements, use extreme caution and consider a minimal amount of baking soda paste on a cloth, applied only to the surrounding metal and wiped away promptly, never directly on the heating coil.
How often should I clean my toaster, especially without a tray?
If you use your toaster daily, a quick upside-down shake should be done weekly to prevent major crumb accumulation. A more thorough cleaning, using brushes and addressing any stubborn spots, is recommended monthly to maintain hygiene, performance, and safety.