Achieving that ideal piece of toast—golden brown, crispy, yet soft inside—is a simple pleasure that often feels like a culinary mystery. Many of us simply push the lever down and hope for the best, or constantly hover over the appliance, ready to hit cancel. But what if we told you the secret to consistently perfect toast lies right at your fingertips, within your toaster’s browning control? Understanding this often-overlooked dial is the first step to transforming your breakfast routine and ensuring every slice meets your exact preference. This guide will demystify the browning control, reveal the hidden factors influencing your toast, and equip you with the knowledge to customize your toasting experience like a true expert.
Understanding Your Toaster’s Browning Control
The browning control on your toaster, whether a simple dial or a slider with numbers, is your primary tool for dictating the shade and crispiness of your toast. While it might seem intuitive, many people mistakenly believe it directly controls temperature. In reality, this crucial setting primarily regulates the duration the heating elements are active. A lower number or lighter setting means the elements stay on for a shorter period, resulting in a gently warmed, pale slice. Conversely, a higher number or darker setting extends the toasting time, allowing for a deeper, richer brown and a crispier texture.
The journey from soft bread to perfectly browned toast is a process of dehydration and a chemical reaction known as the Maillard reaction, where sugars and amino acids react under heat to create those desirable flavors and colors. By adjusting the browning control, you are fine-tuning this process, giving your bread more or less exposure to the radiant heat.
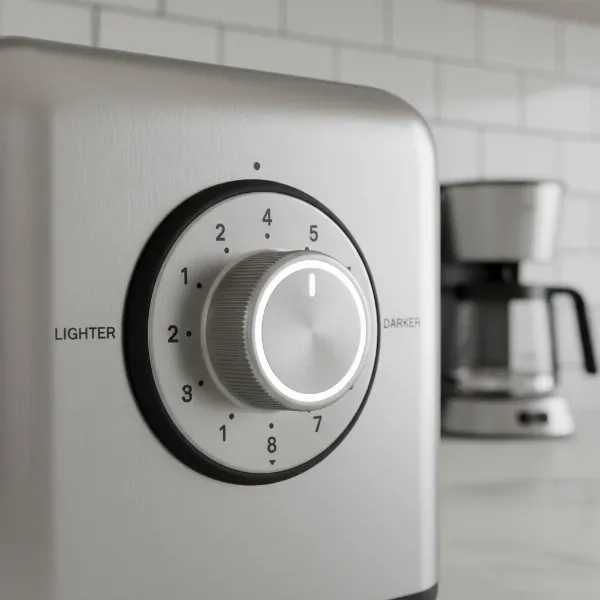 A close-up of a toaster's browning control dial with various settings, from light to dark.
Factors Influencing Your Toast
Achieving consistent results isn’t just about turning a dial; several variables can significantly impact how your bread toasts. Recognizing these factors allows you to make informed adjustments to your browning control.
Bread Type and Moisture Content
The type of bread you use is perhaps the most critical factor. Different breads possess varying densities, thicknesses, and moisture levels, all of which affect toasting time.
- Dry, Thin, or Stale Bread: These slices contain less moisture and will toast much faster than fresh bread. Consequently, they require a lower browning setting to prevent burning.
- Moist, Thick, or Fresh Bread: With higher moisture content, these breads need more time for the water to evaporate before browning can fully occur. A higher setting is typically necessary to achieve a satisfactory toast shade.
- High Sugar Content Bread (e.g., Raisin Bread, Brioche): Sugars caramelize quickly under heat, meaning these breads brown rapidly. Always opt for a lower browning setting to avoid burnt edges and ensure even toasting.
- Denser or Heavier Breads (e.g., Whole Wheat, Rye, Sourdough, Gluten-Free): The increased density and often lower moisture content of these breads mean they absorb heat differently. They generally require a higher browning setting and a longer toasting cycle to reach your desired crispness.
|
Our Picks for the Best Toaster in 2026
As an Amazon Associate I earn from qualifying purchases.
|
||
| Num | Product | Action |
|---|---|---|
| 1 | bella 2 Slice Slim Toaster, Fits-anywhere™ Kitchenware, 6 Setting Shade Control with Reheat & Cancel Buttons, Fits Sourdough, 10” Long Slot, Anti Jam & Auto Shutoff, 900 Watt, Surf |

|
| 2 | Amazon Basics 2 Slice Toaster, With 6 Browning Settings, Extra Wide Slots For Bagels and Special Breads, Removable Easy-to-Clean Crumb Tray, Cancel/Defrost/Bagel Buttons, 900W, Black & Silver |
|
| 3 | Elite Gourmet ECT1027B Cool Touch Toaster with 6 Temperature Settings & Extra Wide 1.25" Slots for Bagels, Waffles, Specialty Breads, Puff Pastry, Snacks, ETL Certified, 2 Slices, Black |
|
| 4 | bella 2 Slice Slim Toaster, Fits-anywhere™ Kitchenware, 6 Setting Shade Control with Reheat & Cancel Buttons, Fits sourdough, 10” Long Slot, Anti Jam & Auto Shutoff, 900 Watt, Plum |
|
| 5 | bella 2 Slice Slim Toaster, Fits-anywhere™ Kitchenware, 6 Setting Shade Control with Reheat & Cancel Buttons, Fits sourdough, 10” Long Slot, Anti Jam & Auto Shutoff, 900 Watt, Blossom |
|
| 6 | bella 2 Slice Slim Toaster, Fits-anywhere™ Kitchenware, 6 Setting Shade Control with Reheat & Cancel Buttons, Fits sourdough, 10” Long Slot, Anti Jam & Auto Shutoff, 900 Watt, Oatmilk |
|
| 7 | KEYWIND VTG RIC DELUXE LONG SE |
|
| 8 | STRING SET BASS STD 45w 55w 75w 105w |
|
| 9 | Touch Screen Toaster - 4 Slice, 2 Extra Long Slots - 5 Bread Types and 6 Browning Levels - Defrost, Reheat, Favorite, & Single Slot Modes - For Toast, Bagels, & Waffles – White |
|
| 10 | bella 2 Slice Slim Toaster, Fits-anywhere™ Kitchenware, 6 Setting Shade Control with Reheat & Cancel Buttons, Fits Sourdough, 10” Long Slot, Anti Jam & Auto Shutoff, 900 Watt, Seaglass |
|
Starting Temperature of Bread
The initial temperature of your bread also plays a significant role.
- Frozen Bread: Toasters often come with a dedicated defrost setting, which extends the initial toasting cycle to thaw the bread before browning begins. If your toaster lacks this feature, you’ll need to use a higher browning setting than usual, or run a shorter cycle first to thaw, then a second cycle at your desired browning level.
- Refrigerated Bread: Similar to frozen bread, refrigerated slices will be colder and retain more moisture. They will take longer to toast than room-temperature bread and may require a slightly higher setting.
Toaster Age and Condition
Like any appliance, toasters can show their age. Older models might not heat as efficiently as they once did, requiring you to increase the browning setting to achieve the same results you remember. Additionally, internal components can degrade, leading to inconsistencies.
Consecutive Toasting Cycles
Have you ever noticed your second batch of toast comes out darker than the first, even on the same setting? This is a common phenomenon. The toaster’s heating elements are already warmed up from the first cycle, making subsequent rounds toast more quickly. It’s often advisable to reduce the browning setting slightly for successive batches, or simply keep a watchful eye.
Mastering the Dial: A Step-by-Step Guide to Perfect Toast
Achieving consistent, perfect toast is an art, but one that’s easily learned with a little experimentation and attention.
Start with a Mid-Setting
When toasting a new type of bread or using a new toaster, always begin with a middle browning setting (e.g., 3 or 4 on a dial that goes up to 7). This provides a good baseline for most standard sandwich breads. Observe the results carefully.
Observe and Adjust
The key to mastery is observation.
- Too Light? If your toast is too pale for your liking, increase the browning setting incrementally for your next slice. Move up by half a number or one notch at a time.
- Too Dark? If it’s too dark or burnt, reduce the setting for the next batch.
- Personal Preference: Everyone has a different definition of “perfect toast.” Don’t be afraid to experiment until you find your ideal shade. Once you discover it for a particular bread, make a mental note (or even a physical one!) of the setting.
Consistency is Key
For the most predictable results, try to maintain consistency in your bread.
- Thickness: Slice your bread to a uniform thickness. Overly thick slices can jam pop-up toasters or toast unevenly.
- Type: Stick to the same type of bread for a given setting until you’ve mastered its nuances.
- Freshness: Be mindful of the bread’s freshness level, as moisture content changes over time.
Utilize Special Functions
Many modern toasters come with specialized buttons that can help you achieve better results.
- Defrost: As mentioned, this setting adds time to thaw frozen bread before the browning process.
- Bagel/One-Sided Toasting: This function typically toasts only one side of the bread (usually the cut side of a bagel), leaving the other side warm and soft. It prevents the outside of your bagel from becoming overly crispy.
- Reheat: If your toast has cooled, this setting warms it without adding further browning.
Troubleshooting Uneven Toasting
Sometimes, despite your best efforts, your toast might come out unevenly browned. Here’s how to troubleshoot common issues:
Toaster Hot Spots
Some toasters, especially older or cheaper models, might have internal hot spots that cause certain areas of the toast to brown faster than others. If you consistently notice one side or corner burning, consider rotating the bread halfway through the cycle (if using a toaster oven) or even flipping it during a mid-cycle check in a pop-up toaster (carefully!).
Crumbs and Cleanliness
Accumulated crumbs in the bottom of your toaster can be a major culprit for uneven toasting, and even a fire hazard. Crumbs can interfere with the heating elements, causing inconsistent heat distribution. Regular cleaning of the crumb tray is essential for both safety and performance.
Bread Positioning
Ensure your bread slices are centered and not overlapping in the toaster slots. Improper positioning can lead to areas being under-toasted or over-toasted.
Beyond the Pop-Up: Browning Control in Other Toaster Types
While pop-up toasters are the most common, browning control principles apply to other toaster types as well.
Toaster Oven
Toaster ovens offer more versatility, functioning as a small oven in addition to toasting. Their browning control is often linked to a temperature setting and a timer. You’ll typically set a temperature (e.g., 350-400°F for toast) and then monitor it, flipping halfway through. The “toast” specific setting on a toaster oven usually uses specific heating elements (top and bottom) for direct browning, mimicking a pop-up toaster but with an open-face view. The same rules apply: denser breads need more time, moist breads need more time, and observation is key.
Tips for Toaster Maintenance for Consistent Results
Proper maintenance is crucial not just for the longevity of your toaster, but also for ensuring consistent and even toasting.
Regular Crumb Tray Cleaning
This is perhaps the most important maintenance task.
- Unplug the Toaster: Always ensure the toaster is unplugged before cleaning.
- Remove Crumb Tray: Slide out the crumb tray from the bottom of the toaster.
- Discard Crumbs: Empty the crumbs into a waste bin.
- Wipe Clean: Wipe the tray with a damp cloth or sponge. For stubborn residue, a little dish soap can help.
- Clean Inside (Optional): Gently shake the toaster upside down over a sink to dislodge any remaining crumbs. You can also use a soft brush to carefully remove crumbs from inside the slots.
- Reinsert Tray: Ensure the crumb tray is completely dry before reinserting it.
A clean toaster prevents burnt crumbs from smoking, eliminates odors, and helps maintain even heat distribution for that perfect golden hue.
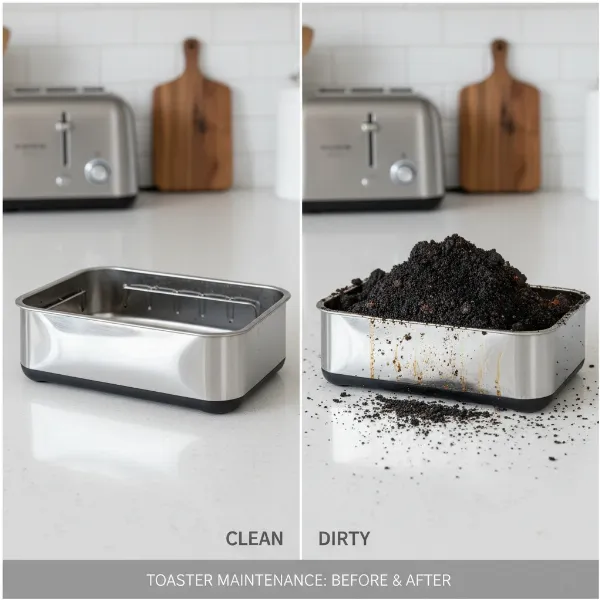 Visual comparison of a clean toaster crumb tray next to a tray filled with crumbs.
“Many assume toasters are ‘set it and forget it’ devices, but understanding variables like bread type and even the toaster’s internal temperature can elevate your toast game from hit-or-miss to perfectly consistent.” – Chef Elena Rodriguez, Culinary Technologist
Conclusion
The pursuit of perfect toast is a delicious journey, and your toaster’s browning control is your most reliable compass. By understanding that this dial primarily governs toasting duration, and by appreciating how factors like bread type, moisture, and even your toaster’s age play a role, you gain unprecedented control over your breakfast. Don’t be afraid to experiment, observe, and adjust until you discover the ideal settings for all your favorite breads. With a little practice and mindful use, every slice can be a testament to your newfound toasting expertise. What’s your secret to the perfect golden-brown slice?
Frequently Asked Questions
What do the numbers on my toaster browning dial actually mean?
The numbers on your toaster dial don’t typically represent minutes or a specific temperature. Instead, they indicate a range of preset time intervals for the heating elements. A lower number corresponds to a shorter heating cycle, producing lighter toast, while a higher number signifies a longer cycle for darker, crispier results. Think of them as shades of brown, not units of time.
Why does my toaster burn one side of the bread?
Uneven browning can be caused by several factors. Your toaster might have internal hot spots, which are common in older or less expensive models. Accumulated crumbs in the crumb tray can also obstruct heating elements, leading to inconsistent heat distribution. Ensure your bread is centered in the slot, and try rotating or flipping the bread halfway through the cycle if the problem persists.
Can I toast frozen bread in my regular toaster?
Yes, you can toast frozen bread in most pop-up toasters. Many modern toasters have a dedicated “defrost” setting that extends the cycle to thaw the bread before it begins to brown. If your toaster lacks this feature, you may need to use a slightly higher browning setting or run a quick, low-setting cycle first to thaw, followed by a second cycle at your desired browning level.
Why does the first slice of toast come out lighter than the second?
This is a very common observation! Your toaster needs to warm up to its optimal operating temperature. During the first toasting cycle, some heat is absorbed by the cold internal components. By the second cycle, the toaster is already preheated, allowing it to toast more efficiently and often resulting in a darker slice on the same setting. It’s often advisable to slightly reduce the browning setting for subsequent batches.
How do different bread types affect browning control settings?
Different bread types have varying moisture content, density, and sugar levels, all of which impact toasting time. Breads that are dry, thin, or high in sugar (like raisin bread) will toast faster and require lower settings. Conversely, moist, thick, or dense breads (such as whole wheat or sourdough) will need higher settings to achieve the same level of browning. Experimentation is key to finding the perfect setting for each type of bread.