Our toasters are the unsung heroes of countless breakfasts, transforming plain bread into golden, crispy perfection. But lurking beneath that delightful crunch is a hidden hazard many of us overlook: the crumb tray. Neglecting this simple component isn’t just about a messy kitchen; it’s a genuine fire risk that can jeopardize your home and family. Understanding how to properly clean your toaster’s crumb tray is paramount for safety, optimal performance, and even the taste of your toast. This comprehensive guide will walk you through the why, what, and how of maintaining a spotless and safe toaster.
Why a Clean Toaster Crumb Tray is Crucial
You might wonder if a few crumbs really matter. The answer is a resounding yes! The accumulation of breadcrumbs and food debris in your toaster’s tray and interior poses several significant risks that extend far beyond aesthetics.
Fire Prevention: The Primary Concern
|
Our Picks for the Best Toaster in 2026
As an Amazon Associate I earn from qualifying purchases.
|
||
| Num | Product | Action |
|---|---|---|
| 1 | STRING SET BASS STD 45w 55w 75w 105w |

|
| 2 | Amazon Basics 2 Slice Toaster, With 6 Browning Settings, Extra Wide Slots For Bagels and Special Breads, Removable Easy-to-Clean Crumb Tray, Cancel/Defrost/Bagel Buttons, 900W, Black & Silver |
|
| 3 | Elite Gourmet ECT1027B Cool Touch Toaster with 6 Temperature Settings & Extra Wide 1.25" Slots for Bagels, Waffles, Specialty Breads, Puff Pastry, Snacks, ETL Certified, 2 Slices, Black |
|
| 4 | bella 2 Slice Slim Toaster, Fits-anywhere™ Kitchenware, 6 Setting Shade Control with Reheat & Cancel Buttons, Fits Sourdough, 10” Long Slot, Anti Jam & Auto Shutoff, 900 Watt, Surf |
|
| 5 | KEYWIND VTG RIC DELUXE LONG SE |
|
| 6 | Touch Screen Toaster - 4 Slice, 2 Extra Long Slots - 5 Bread Types and 6 Browning Levels - Defrost, Reheat, Favorite, & Single Slot Modes - For Toast, Bagels, & Waffles – White |
|
| 7 | bella 2 Slice Slim Toaster, Fits-anywhere™ Kitchenware, 6 Setting Shade Control with Reheat & Cancel Buttons, Fits sourdough, 10” Long Slot, Anti Jam & Auto Shutoff, 900 Watt, Plum |
|
| 8 | bella 2 Slice Slim Toaster, Fits-anywhere™ Kitchenware, 6 Setting Shade Control with Reheat & Cancel Buttons, Fits Sourdough, 10” Long Slot, Anti Jam & Auto Shutoff, 900 Watt, Seaglass |
|
| 9 | bella 2 Slice Slim Toaster, Fits-anywhere™ Kitchenware, 6 Setting Shade Control with Reheat & Cancel Buttons, Fits sourdough, 10” Long Slot, Anti Jam & Auto Shutoff, 900 Watt, Blossom |
|
| 10 | bella 2 Slice Slim Toaster, Fits-anywhere™ Kitchenware, 6 Setting Shade Control with Reheat & Cancel Buttons, Fits sourdough, 10” Long Slot, Anti Jam & Auto Shutoff, 900 Watt, Oatmilk |
|
The most critical reason to keep your crumb tray clean is fire prevention. Toasters operate with high heat. Over time, crumbs and stray food particles collect at the bottom, directly beneath the heating elements. These dried-out fragments are highly flammable. When the toaster heats up, these crumbs can easily ignite, leading to smoke, a small fire within the appliance, or even a larger kitchen blaze. Grease and residue from items like bagels or pastries can exacerbate this danger, turning ordinary crumbs into even more volatile fuel.
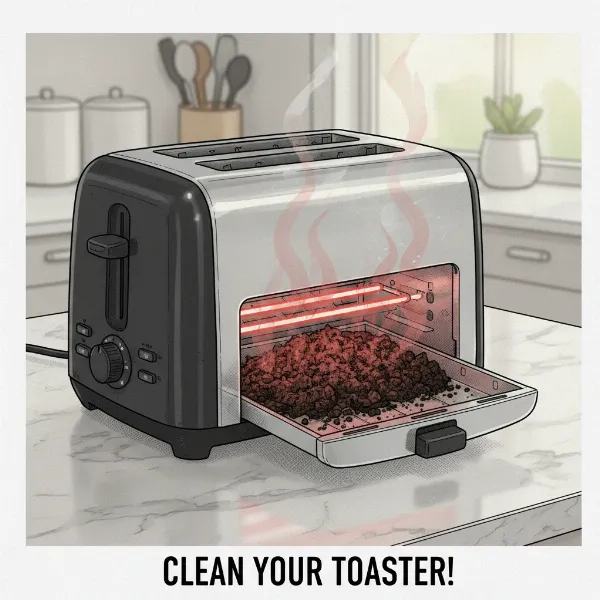 Illustration of a toaster with a dirty crumb tray showing potential fire hazard.
Preserving Toast Quality and Flavor
Beyond safety, a dirty toaster impacts your culinary experience. Old, burnt crumbs and charring residue can impart an unpleasant, acrid taste and smell to your freshly toasted bread. This “ghost” of previous toastings can ruin the flavor profile of your morning meal, making your toast taste stale or simply “off.” A clean toaster ensures each slice comes out tasting exactly as it should.
Extending Appliance Lifespan and Efficiency
Regular maintenance, including crumb tray cleaning, contributes significantly to your toaster’s longevity and performance. Accumulated debris can interfere with the heating elements, leading to uneven toasting or decreased efficiency. By keeping the interior clear, you allow your toaster to work as designed, ensuring it heats evenly and functions optimally for years to come. Think of it as essential care for a vital kitchen appliance.
Maintaining Kitchen Hygiene
Crumbs aren’t just a fire hazard; they’re also an open invitation to pests. Ants, cockroaches, and other unwelcome guests are attracted to food scraps, and a crumb-filled toaster provides a ready feast. Regularly emptying and cleaning the tray removes this food source, contributing to overall kitchen hygiene and keeping your home pest-free.
Step-by-Step Guide to Cleaning Your Toaster Crumb Tray
Cleaning your toaster’s crumb tray is a straightforward process that takes only a few minutes but yields immense benefits. Follow these steps for a safe and effective clean.
1. Safety First: Unplug and Cool Down
Before you begin any cleaning, prioritize safety. Always ensure your toaster is:
- Unplugged: Disconnect the appliance from the power outlet to eliminate any risk of electric shock.
- Completely Cooled: Allow the toaster to cool down thoroughly after its last use. Hot heating elements or interior surfaces can cause burns.
2. Locate and Remove the Crumb Tray
Most modern toasters feature a removable crumb tray at the bottom.
- Identify the Tray: Look for a small handle, notch, or lip, usually at the front, side, or back of the toaster’s base.
- Slide Out: Gently slide the tray out completely. If it feels stuck, do not force it; check for any obstructions.
3. Empty Loose Crumbs
Once the tray is removed:
- Discard Crumbs: Tip the tray directly over a trash can to empty all loose crumbs and debris.
- Tap Gently: For stubborn bits, give the tray a few gentle taps against the inside of the trash can.
4. Clean the Crumb Tray Thoroughly
The crumb tray often accumulates sticky residue or burnt-on spots, requiring more than just emptying.
- Wash with Soap and Water: Wash the tray in a sink with warm, soapy water and a non-abrasive sponge or cloth. Dish soap with a degreasing agent is ideal for cutting through grease.
- For Stubborn Residue:
- Soak: If there’s burnt-on food, let the tray soak in hot, soapy water for 15-20 minutes to loosen the grime.
- Scrub: Use a plastic or wooden spatula to gently scrape off tough bits. Avoid metal scrubbers or abrasive pads that could scratch the tray’s surface.
- Vinegar Solution: For particularly sticky or greasy residue, dampen a microfiber cloth with white vinegar and gently wipe the tray. Never apply liquids directly to the tray if it could seep into the toaster’s electrical components.
- Rinse and Dry Completely: Rinse the tray thoroughly with clean water and ensure it is absolutely dry before reinserting it. Any lingering moisture can cause issues when the toaster is used again.
5. Clear Internal Crumbs
Even with a removable tray, crumbs can fall into other areas of the toaster.
- Invert and Shake: Over a trash can or sink, turn the entire toaster upside down and gently shake it to dislodge any crumbs caught inside the slots or around the heating elements. Avoid vigorous shaking which could damage internal components.
- Brush Away Debris: Use a clean, dry pastry brush or a soft, unused toothbrush to gently sweep away crumbs from the interior walls and around the heating coils. Be careful not to touch the heating elements directly, as they are delicate.
- Avoid Metal Objects: Never insert metal utensils, knives, or forks into the toaster slots, especially if it’s plugged in. This poses a serious risk of electric shock or damage.
6. Wipe Down the Exterior
While not directly related to fire prevention from crumbs, a clean exterior contributes to overall kitchen hygiene.
- Damp Cloth: Dampen a clean cloth with warm, soapy water and wipe down the exterior of your toaster to remove fingerprints, splatters, and dust.
- Polish: Dry and polish with a clean microfiber cloth for a streak-free shine.
7. Reassemble and Return
Once all parts are dry and clean:
- Reinsert Crumb Tray: Slide the crumb tray back into its proper position.
- Plug In: Only plug your toaster back into the outlet once all cleaning is complete and all parts are dry.
How Often Should You Clean Your Toaster Crumb Tray?
The frequency of cleaning largely depends on how often you use your toaster. Here’s a general guideline:
- Crumb Tray: Ideally, empty and wipe down the crumb tray after every use or at least every few days (no more than three), especially if you use it daily. This prevents rapid accumulation and greatly reduces fire risk.
- Interior Deep Clean:
- Daily Users: Clean the interior and wash the tray thoroughly once a week.
- Moderate Users (a few times a week): Clean every two weeks.
- Occasional Users (infrequent): A monthly clean should suffice.
- Exterior Wipe Down: If your toaster is a countertop staple, wipe down the exterior weekly. If it’s stored away, less frequent cleaning is acceptable.
Regular visual checks are also important. If you notice a significant build-up of crumbs, smell burning during use, or see smoke, it’s an immediate signal that your toaster needs cleaning, regardless of your last scheduled maintenance.
Common Toaster Types and Crumb Tray Access
While the general principles apply, access to the crumb tray can vary slightly by toaster type:
Pop-Up Toasters
These are the most common and typically feature a single, slide-out crumb tray at the bottom. The cleaning steps outlined above are directly applicable.
Toaster Ovens
Toaster ovens often have a removable crumb tray at the very bottom, along with racks and baking pans. Cleaning a toaster oven crumb tray involves the same principles: unplug, cool, remove, wash, dry, and reassemble. You may also need to clean the interior walls and heating elements of a toaster oven more frequently, as grease splatters are more common.
Troubleshooting Common Issues
- Burning Smell: This is often the most direct indicator of accumulated crumbs or residue burning. Unplug, cool, and clean thoroughly. If the smell persists after cleaning, it might indicate an internal electrical issue and the toaster should be serviced or replaced.
- Uneven Toasting: Can be caused by debris interfering with heating elements. A good interior clean often resolves this.
- Stuck Toast: If toast gets jammed, unplug the toaster immediately before attempting to dislodge it with a non-metal utensil.
“A toaster fire can escalate rapidly. Regular crumb tray cleaning is the simplest and most effective step you can take to prevent a dangerous kitchen incident.” – John Miller, Certified Appliance Safety Expert
Conclusion
Cleaning your toaster’s crumb tray might seem like a small task, but its impact on kitchen safety and appliance longevity is profound. By dedicating a few minutes to this simple maintenance routine, you protect your home from potential fire hazards, ensure your toast always tastes its best, and extend the life of your appliance. Make it a habit to check and clean your toaster’s crumb tray regularly – your future self (and your perfectly golden toast) will thank you.
How often do you currently clean your toaster’s crumb tray, and what cleaning tips have you found most effective?
Frequently Asked Questions
How do I remove stubborn burnt-on residue from my toaster crumb tray?
For stubborn burnt-on residue, soak the crumb tray in warm, soapy water for 15-20 minutes. Then, use a non-abrasive sponge or a plastic/wooden spatula to gently scrape away the loosened bits. A paste made of baking soda and water can also be applied to the residue and allowed to sit before scrubbing.
Can I put my toaster crumb tray in the dishwasher?
While some crumb trays might be labeled “dishwasher safe,” it’s generally best to hand wash them with warm, soapy water. This helps prevent potential damage from high heat or harsh dishwasher detergents and ensures a thorough clean, especially for hard-to-reach corners. Always check your toaster’s manual for specific instructions.
What tools are best for cleaning inside the toaster slots?
A dry pastry brush or a clean, soft toothbrush is ideal for gently dislodging crumbs from inside the toaster slots and around the heating elements. Their small bristles can reach into tight spaces without causing damage. Always ensure the toaster is unplugged and cool before using any tools inside.
How can I tell if my toaster is a fire hazard?
Key indicators that your toaster might be a fire hazard include a burning smell during operation even without toast, excessive smoke, visible flames from inside, or a significant accumulation of crumbs and grease in the bottom. If you notice any of these signs, unplug the toaster immediately and clean it thoroughly. If problems persist, consider replacing the appliance.