Few things are as frustrating in the kitchen as a toaster lever that stubbornly refuses to stay down, leaving you with cold, un-toasted bread. This common household appliance issue can disrupt your morning routine, but it’s often more fixable than you might think. Before you rush to replace your beloved toaster, understanding the root causes and applying a systematic approach can help diagnose and resolve the problem. This guide will walk you through the troubleshooting steps, from simple external checks to more detailed internal inspections, ensuring you can enjoy perfectly toasted bread once again.
Understanding Your Toaster: Why the Lever Won’t Stay Down
Toasters rely on a simple yet ingenious mechanism to deliver that golden-brown crunch. When you press the lever down, it typically engages an electromagnet that holds the bread carriage in place while the heating elements warm up. If this lever doesn’t latch, it means one of several things is preventing this electromechanical process from completing. Recognizing these underlying issues is the first step toward a successful repair.
Common Mechanical Failures
Mechanical obstructions are frequently the culprit behind a non-latching toaster lever. These issues prevent the physical movement of the carriage or the proper engagement of the latching mechanism.
- Crumb Tray Obstruction: A neglected crumb tray that’s overflowing with debris can interfere with the toaster’s lower mechanism. Crumbs can accumulate under the carriage, preventing it from fully descending and engaging the latch.
- Jammed Internal Components: Beyond the crumb tray, stray pieces of bread, forgotten bagel bits, or other foreign objects can become lodged within the toaster’s internal framework. These obstructions can prevent the lever from moving smoothly or the latch from securing.
- Damaged Latching Mechanism: Over time, the internal components of the latch, such as a spring, lever arm, or plastic clips, can become worn, bent, or even broken. If these parts cannot align or hold securely, the lever will simply spring back up.
|
Our Picks for the Best Toaster in 2026
As an Amazon Associate I earn from qualifying purchases.
|
||
| Num | Product | Action |
|---|---|---|
| 1 | bella 2 Slice Slim Toaster, Fits-anywhere™ Kitchenware, 6 Setting Shade Control with Reheat & Cancel Buttons, Fits sourdough, 10” Long Slot, Anti Jam & Auto Shutoff, 900 Watt, Oatmilk |

|
| 2 | bella 2 Slice Slim Toaster, Fits-anywhere™ Kitchenware, 6 Setting Shade Control with Reheat & Cancel Buttons, Fits sourdough, 10” Long Slot, Anti Jam & Auto Shutoff, 900 Watt, Blossom |
|
| 3 | Touch Screen Toaster - 4 Slice, 2 Extra Long Slots - 5 Bread Types and 6 Browning Levels - Defrost, Reheat, Favorite, & Single Slot Modes - For Toast, Bagels, & Waffles – White |
|
| 4 | bella 2 Slice Slim Toaster, Fits-anywhere™ Kitchenware, 6 Setting Shade Control with Reheat & Cancel Buttons, Fits Sourdough, 10” Long Slot, Anti Jam & Auto Shutoff, 900 Watt, Seaglass |
|
| 5 | Elite Gourmet ECT1027B Cool Touch Toaster with 6 Temperature Settings & Extra Wide 1.25" Slots for Bagels, Waffles, Specialty Breads, Puff Pastry, Snacks, ETL Certified, 2 Slices, Black |
|
| 6 | bella 2 Slice Slim Toaster, Fits-anywhere™ Kitchenware, 6 Setting Shade Control with Reheat & Cancel Buttons, Fits Sourdough, 10” Long Slot, Anti Jam & Auto Shutoff, 900 Watt, Surf |
|
| 7 | bella 2 Slice Slim Toaster, Fits-anywhere™ Kitchenware, 6 Setting Shade Control with Reheat & Cancel Buttons, Fits sourdough, 10” Long Slot, Anti Jam & Auto Shutoff, 900 Watt, Plum |
|
| 8 | STRING SET BASS STD 45w 55w 75w 105w |
|
| 9 | KEYWIND VTG RIC DELUXE LONG SE |
|
| 10 | Amazon Basics 2 Slice Toaster, With 6 Browning Settings, Extra Wide Slots For Bagels and Special Breads, Removable Easy-to-Clean Crumb Tray, Cancel/Defrost/Bagel Buttons, 900W, Black & Silver |
|
Common Electrical Failures
While mechanical problems are common, electrical faults can also cause the lever to malfunction. These issues typically relate to the power supply or the components responsible for holding the lever down.
- Faulty Solenoid/Electromagnet: This is the electrical component responsible for physically holding the lever down during the toasting cycle. If the solenoid is damaged, dirty, or not receiving power, it won’t be able to generate the magnetic force needed to keep the lever engaged.
- Overheating Sensor Triggered: Many modern toasters include safety features, such as an overheating sensor. If the toaster detects excessive heat or a potential fault, it may prevent the lever from engaging as a protective measure to avoid hazards.
- Malfunctioning Heating Elements: If the toaster’s heating elements are faulty or broken, the toaster won’t be able to generate heat. Since the latching mechanism is often tied to the toaster’s ability to heat, a failure here can prevent the lever from staying down.
- Power Supply Issues: The problem might not even be with the toaster itself. An issue with the power outlet, a tripped breaker, or a faulty cord can prevent the toaster from receiving the necessary electricity to operate its internal components, including the solenoid.
Safety First: Essential Steps Before Any Toaster Repair
Before you attempt any repairs or even internal inspection, safety must be your top priority. Working with electrical appliances, even unplugged ones, requires caution. Taking these preliminary steps can prevent injuries and further damage to your appliance.
- Always Unplug: This is the most crucial step. Disconnect your toaster from the wall outlet completely. This eliminates any risk of electric shock while you are inspecting or working on the appliance.
- Allow to Cool: Toasters get very hot during operation. Allow your toaster ample time to cool down before handling it, especially if it was recently used. This prevents burns and discomfort during the repair process.
- Never Immerse in Water: Do not attempt to wash your toaster or immerse it in water. This poses a severe risk of electric shock and can permanently damage the internal components.
- Use Non-Conductive Tools: When probing inside the toaster or dislodging crumbs, use tools made of wood, plastic, or silicone. Avoid metal objects that could short-circuit components or scratch the heating elements.
- Assess Your Comfort Level: While many toaster issues are simple fixes, some require more advanced electrical knowledge. If at any point you feel uncomfortable or uncertain about proceeding, it’s best to stop and consider professional help or replacement.
Step-by-Step Guide to Fixing Your Toaster Lever
Once safety precautions are in place, you can begin the diagnostic and repair process. Start with the simplest solutions and gradually move to more complex troubleshooting steps.
Phase 1: External Checks and Basic Cleaning
Many lever issues can be resolved without needing to open up your toaster. These initial checks focus on common external problems and basic maintenance.
- Clear the Area: Ensure there’s nothing physically obstructing the toaster lever from the outside. Sometimes, a cutting board, a utensil, or even a countertop overhang might be preventing the full range of motion.
- Inspect and Empty the Crumb Tray: This is often the quickest fix.
- How to: Locate the crumb tray, usually a slide-out drawer at the bottom of the toaster. Pull it out, shake out all accumulated crumbs into a bin, and then wipe the tray clean with a dry cloth.
- Why: Over time, crumbs build up, and if the tray is too full or not properly seated, it can physically block the toaster’s internal mechanism, preventing the carriage from fully descending and the lever from latching. Ensure the tray slides back in smoothly and is fully pushed in.
- Look Inside the Toasting Slots: Even after emptying the crumb tray, larger pieces of food or debris might be stuck higher up within the toaster slots.
- How to: With the toaster unplugged and upside down, gently shake it to dislodge any loose crumbs or pieces of bread. You can also carefully use a soft, non-metallic brush or a wooden skewer to dislodge stubborn bits. Avoid using anything metallic that could damage the heating elements.
- Why: Stuck toast or large pieces of debris can prevent the bread carriage from descending to its lowest point, where the latch mechanism engages.
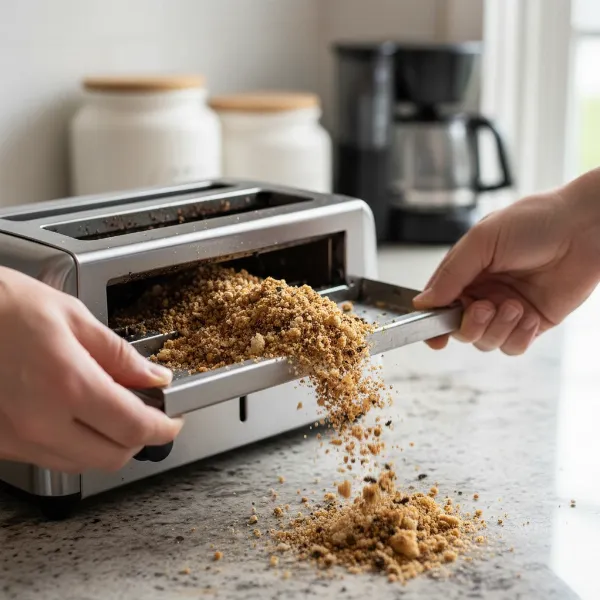 A person emptying a toaster crumb tray, showing accumulated crumbs and debris.
Phase 2: Addressing Mechanical Obstructions and Wear
If basic cleaning doesn’t resolve the issue, you might need to inspect the mechanical parts more closely. This often involves carefully opening the toaster’s casing.
- Accessing Internal Components (if necessary and safe):
- Warning: Only proceed if you are comfortable with basic appliance disassembly. Different toaster models have different designs; some may not be easily opened. Look for screws on the bottom panel.
- How to: Place the unplugged toaster on a clean, stable surface. Carefully unscrew the bottom panel, if accessible. This will often expose the internal workings and the lower part of the lever mechanism.
- Inspect the Latching Mechanism: Once the internals are somewhat visible, observe the lever’s movement.
- Identify: Locate the lever arm, the spring attached to it, and the part of the carriage it interacts with to latch. You might need to gently manipulate the lever to see these components in action.
- Check for: Look for any visible bends in metal parts, dislodged springs, or broken plastic pieces that might be preventing the lever from fully engaging.
- Action: If you find a slightly bent metal piece, you might be able to gently straighten it with pliers. If a spring has come loose, carefully try to re-seat it in its correct position. Be very gentle, as these parts can be delicate.
- Clean Internal Moving Parts: Fine crumbs and dust can accumulate around the moving parts of the lever mechanism, creating friction or outright blockage.
- How to: Use compressed air (short bursts) or a dry, soft brush to remove any debris from around the lever, springs, and other mechanical components. Avoid using any liquids.
- Why: Even tiny particles can gum up the works, preventing the smooth operation of the latch.
“Many toaster lever issues stem from simple crumb build-up. A thorough cleaning can often resolve the problem without needing complex repairs.” – Johnathan Davies, Senior Appliance Technician at FixItRight
Phase 3: Troubleshooting Electrical Components (Use Caution!)
If the mechanical parts appear to be in good working order, the problem might be electrical. These steps involve checking the toaster’s power and key electrical components. For any advanced electrical troubleshooting, always err on the side of caution.
- Test the Power Outlet:
- How to: Plug another small, working appliance (like a lamp or phone charger) into the same outlet your toaster uses.
- Why: This quickly rules out a faulty wall outlet or a tripped circuit breaker as the cause. If the other appliance doesn’t work, the issue is with your power supply, not the toaster.
- Visual Inspection of Heating Elements:
- How to: With the toaster still unplugged, carefully look down into the toasting slots. Observe the heating elements (the glowing wires). Look for any obvious breaks, disconnections, or areas where the element appears damaged.
- Why: If a heating element is completely broken, the toaster may not be able to generate heat, and consequently, the electrical circuit that powers the solenoid might not engage, preventing the lever from latching.
- Solenoid/Electromagnet Check (Advanced – Use Extreme Caution): This is a more advanced step and should only be attempted by those comfortable with basic electrical diagnosis.
- How to: (With the toaster safely reassembled and briefly plugged in for this test only, if you choose to proceed) Carefully press the lever down. Listen for a faint hum or click. This indicates the solenoid is attempting to engage. If there’s no sound, the solenoid might be faulty or not receiving power. It’s generally safer to consider professional help if you suspect a solenoid issue rather than attempting electrical diagnostics yourself.
- Safer Approach: Instead of direct testing, focus on ensuring that visible contacts leading to the solenoid are clean and unobstructed, if they are safely accessible without further disassembly. If all mechanical and basic electrical checks fail, a faulty solenoid is a strong possibility, pointing towards professional repair or replacement.
When to Call a Professional or Consider a New Toaster
While DIY repairs are empowering, there are times when it’s more practical or safer to seek professional help or simply invest in a new appliance. Knowing when to draw the line is important for both safety and cost-effectiveness.
- Complex Electrical Faults: If you suspect a faulty solenoid, complex wiring issues, or other internal electrical problems beyond a simple cleaning, it’s best to consult a qualified appliance repair technician. Attempting advanced electrical repairs without proper training can be dangerous.
- Irreparable Mechanical Damage: If internal components are severely bent, broken, or parts are missing and cannot be easily sourced or replaced, the repair might be beyond a DIY fix.
- Cost vs. New Unit: For older, inexpensive toasters, the cost of professional repair can often exceed the price of a brand-new toaster. Weigh the repair estimate against the cost of a replacement before committing to a fix.
- Safety Concerns: If at any point you feel unsafe, notice burning smells, sparking, or smoke, immediately unplug the toaster and discontinue use. Safety should always be your paramount concern.
Prolonging Your Toaster’s Life: Maintenance Tips
Preventing issues before they start is always the best approach. Regular maintenance can significantly extend the lifespan of your toaster and keep its lever working smoothly.
- Regular Crumb Tray Cleaning: Make it a habit to empty the crumb tray frequently – ideally after every few uses or at least weekly if you toast regularly. This prevents crumb buildup from becoming an issue.
- Avoid Forcing the Lever: Be gentle when pressing the lever down. Forcing it can bend or break internal mechanical components over time, leading to repair issues.
- Don’t Overload: Stick to recommended toast thickness and avoid trying to toast items that are too large or don’t fit properly in the slots. Overloading can jam the mechanism and strain the internal parts.
- Unplug When Not in Use: As a general safety practice, unplug your toaster (and other small appliances) when it’s not in use. This not only saves a tiny bit of electricity but also minimizes risks.
- Store Properly: Keep your toaster in a clean, dry area where it won’t be exposed to excessive dust, moisture, or impacts that could damage its exterior or internal components.
Conclusion
Fixing a toaster lever that won’t stay down is often a manageable task, typically stemming from crumb buildup or minor mechanical obstructions. By following safety precautions and systematic troubleshooting, you can diagnose and potentially resolve the issue yourself, restoring your appliance to full functionality. Remember, prioritizing safety is paramount, and knowing when to seek professional help or replace the appliance ensures your kitchen remains both functional and secure. Don’t let a stubborn lever ruin your morning toast; take a moment to understand and maintain this essential kitchen gadget. What simple maintenance tip has saved your toaster from the bin?
Frequently Asked Questions
Why does my toaster lever pop up immediately?
This often indicates a power issue, a fully engaged safety sensor, or a mechanical obstruction preventing the electromagnet from holding the lever down. It could be due to dirty contacts, crumbs jamming the mechanism, or a faulty solenoid, all of which prevent the necessary circuit from closing.
Can a dirty toaster cause the lever to not stay down?
Absolutely. Accumulated crumbs and debris are a leading cause of toaster levers not latching. They can physically interfere with the mechanical movement of the lever, preventing it from reaching its locked position, or even block electrical contacts, disrupting the power to the solenoid.
Is it safe to fix a toaster myself?
Basic toaster repairs, like thoroughly cleaning the crumb tray and removing visible obstructions from the slots, are generally safe provided the toaster is unplugged and cool. For more complex electrical or internal mechanical issues requiring disassembly, it’s safer to consult a professional or consider replacement.
What tools do I need to fix a toaster lever?
For most common issues, you’ll need basic tools like a soft brush (a clean paintbrush works), a non-metallic spatula or wooden skewer, and possibly a screwdriver (Phillips or flathead) if you need to access the toaster’s internal bottom panel for deeper cleaning. Compressed air can also be helpful.
How often should I clean my toaster?
The crumb tray should be emptied after every few uses or at least weekly for regular toast eaters, to prevent buildup. A deeper internal clean, which involves visually inspecting and removing trapped crumbs from the slots, can be done monthly or whenever you notice performance issues.