Few things start the day quite like a perfectly golden slice of toast. But when your trusty toaster suddenly refuses to perform its morning magic, leaving you with cold, unheated bread, it can be incredibly frustrating. As a seasoned technician with over a decade immersed in the world of toasters, I’ve seen countless machines suffer from various ailments, and often, the root cause lies within an electrical continuity issue. Understanding how to check for continuity in a broken toaster isn’t just a technical skill; it’s the key to diagnosing problems accurately, saving money on unnecessary replacements, and bringing your beloved appliance back to life.
This guide will walk you through the entire process, from understanding your toaster’s electrical heartbeat to performing step-by-step continuity tests on its vital components. We’ll cover everything from essential safety precautions to interpreting multimeter readings, empowering you to identify and address the electrical faults that prevent your toaster from delivering that satisfying crunch.
Understanding Toaster Electrical Systems
Before diving into diagnostics, it’s crucial to grasp the basic electrical principles that govern your toaster’s operation. Every component plays a role in creating a complete circuit, allowing electricity to flow and generate the heat needed for toasting.
Basic Toaster Components and Their Function
|
Our Picks for the Best Toaster in 2026
As an Amazon Associate I earn from qualifying purchases.
|
||
| Num | Product | Action |
|---|---|---|
| 1 | Touch Screen Toaster - 4 Slice, 2 Extra Long Slots - 5 Bread Types and 6 Browning Levels - Defrost, Reheat, Favorite, & Single Slot Modes - For Toast, Bagels, & Waffles – White |

|
| 2 | STRING SET BASS STD 45w 55w 75w 105w |
|
| 3 | bella 2 Slice Slim Toaster, Fits-anywhere™ Kitchenware, 6 Setting Shade Control with Reheat & Cancel Buttons, Fits sourdough, 10” Long Slot, Anti Jam & Auto Shutoff, 900 Watt, Plum |
|
| 4 | Elite Gourmet ECT1027B Cool Touch Toaster with 6 Temperature Settings & Extra Wide 1.25" Slots for Bagels, Waffles, Specialty Breads, Puff Pastry, Snacks, ETL Certified, 2 Slices, Black |
|
| 5 | bella 2 Slice Slim Toaster, Fits-anywhere™ Kitchenware, 6 Setting Shade Control with Reheat & Cancel Buttons, Fits sourdough, 10” Long Slot, Anti Jam & Auto Shutoff, 900 Watt, Blossom |
|
| 6 | bella 2 Slice Slim Toaster, Fits-anywhere™ Kitchenware, 6 Setting Shade Control with Reheat & Cancel Buttons, Fits Sourdough, 10” Long Slot, Anti Jam & Auto Shutoff, 900 Watt, Surf |
|
| 7 | bella 2 Slice Slim Toaster, Fits-anywhere™ Kitchenware, 6 Setting Shade Control with Reheat & Cancel Buttons, Fits sourdough, 10” Long Slot, Anti Jam & Auto Shutoff, 900 Watt, Oatmilk |
|
| 8 | KEYWIND VTG RIC DELUXE LONG SE |
|
| 9 | bella 2 Slice Slim Toaster, Fits-anywhere™ Kitchenware, 6 Setting Shade Control with Reheat & Cancel Buttons, Fits Sourdough, 10” Long Slot, Anti Jam & Auto Shutoff, 900 Watt, Seaglass |
|
| 10 | Amazon Basics 2 Slice Toaster, With 6 Browning Settings, Extra Wide Slots For Bagels and Special Breads, Removable Easy-to-Clean Crumb Tray, Cancel/Defrost/Bagel Buttons, 900W, Black & Silver |
|
A typical pop-up toaster, for example, is a deceptively simple device containing several key electrical parts. The heating elements, usually made of Nichrome wire, are the workhorses, converting electrical energy into radiant heat. A thermostat regulates this heat, often employing a bimetallic strip that bends and breaks the circuit when a certain temperature is reached, or a timer-based mechanism. The timer itself controls the duration of the toasting cycle. For toasters that automatically lower the bread, a solenoid or latching mechanism holds the carriage down during operation. Finally, the power cord and plug are the gateway for electricity from your wall outlet.
Why Continuity Matters in a Toaster
Continuity simply means there’s an uninterrupted path for electricity to flow through a circuit or component. Think of it like a river: for water to flow, the riverbed must be continuous, without any dams or breaks. In a toaster, every part of the electrical circuit, from the plug to the heating elements and back, must have continuity for the appliance to function. If there’s a break—an open circuit—electricity cannot flow, and the component, or the entire toaster, will fail to operate. This makes continuity testing an invaluable diagnostic step.
Essential Tools for Continuity Testing
To effectively troubleshoot your broken toaster, you’ll need a few specialized tools. The most important of these is the multimeter, but a couple of other items will also prove useful.
Multimeter: Your Go-To Diagnostic Tool
A multimeter is a versatile electronic measuring instrument that can test voltage, current, and resistance. For continuity testing, you’ll primarily use its resistance (ohms) or dedicated continuity mode. Digital multimeters are generally easier to read for beginners, displaying precise numerical values.
To prepare your multimeter for a continuity test, you’ll usually turn the dial to the “ohms” (Ω) setting, often found within the resistance range. Many modern digital multimeters also feature a specific continuity mode, often indicated by a diode symbol (a triangle with a line) or a soundwave icon. This mode typically provides an audible beep when continuity is detected, making it incredibly convenient for quick checks. Before testing any component, touch the two multimeter probes together. The display should show a reading very close to zero ohms (e.g., 0.0-0.5 Ω) or, if in continuity mode, emit a distinct beep. This confirms your multimeter is functioning correctly.
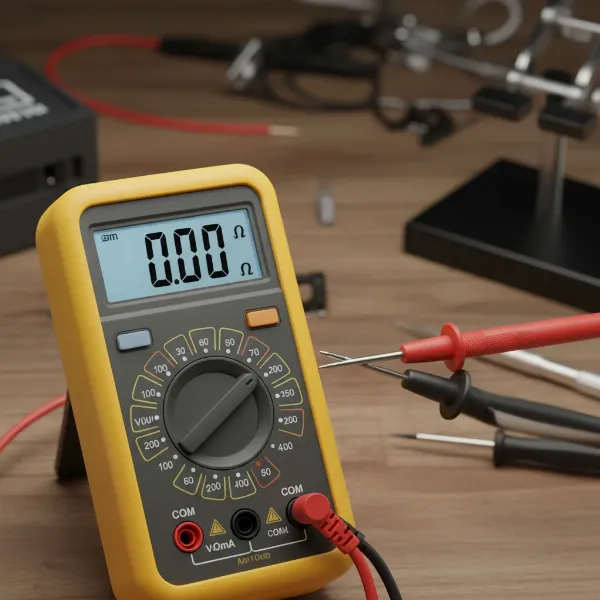 Digital multimeter setup for continuity test, probes touching, display showing low resistance.
Other Useful Tools
Beyond the multimeter, a basic set of screwdrivers (Phillips and flathead) will be indispensable for disassembling your toaster. Depending on the model, you might encounter tamper-proof screws, requiring specialized bits. Wire strippers may be necessary if you need to expose wires for testing, although this is less common for basic continuity checks. Finally, a pair of alligator clips can make testing easier by allowing for hands-free connections to components.
Safety First: Before You Begin
Working with electrical appliances always carries inherent risks. Your safety is paramount. Never compromise on these critical precautions.
Unplugging and Discharging
This is the golden rule: Always unplug your toaster from the wall outlet before you begin any inspection, disassembly, or testing. Even if the toaster appears dead, residual current can still be present, posing a shock hazard. After unplugging, allow the toaster to cool down completely, as heating elements can retain significant heat for some time. This prevents burns and ensures the components are at a stable temperature for accurate readings.
Visual Inspection for Obvious Damage
Once unplugged and cool, perform a thorough visual inspection. Look for any overt signs of damage that might explain the malfunction without requiring a multimeter. This includes:
- Frayed, cut, or burnt power cords.
- Melted plastic or burnt spots on the exterior or interior.
- Loose or disconnected wires visible through vents or openings.
- Excessive crumb buildup in the crumb tray or around heating elements, which can sometimes cause shorts or obstruct mechanisms.
Addressing these obvious issues first can often save you further diagnostic effort.
Step-by-Step Guide: Checking Continuity in a Broken Toaster
With safety measures in place and your tools ready, it’s time to systematically diagnose your toaster. We’ll examine the key components that commonly develop continuity problems.
Step 1: Disassemble the Toaster Safely
Accessing the internal components of a toaster requires careful disassembly. Most pop-up toasters have screws located on the bottom, often hidden beneath rubber feet or small plastic covers. Toaster ovens may have screws on the side or back panels.
- Locate all screws: Turn the toaster upside down and meticulously search for all fasteners.
- Document screw locations: Take photos or make notes as you remove screws. Different screws might secure different parts, and knowing where they belong will simplify reassembly.
- Gently remove the casing: Once all screws are out, carefully separate the outer casing from the internal chassis. Be mindful of any wires connecting the casing (e.g., indicator lights) that might still be attached.
Step 2: Testing the Power Cord
A faulty power cord is a surprisingly common culprit. Breaks in the cord can prevent any power from reaching the toaster’s internal circuitry.
- Unplug the toaster (again, if you plugged it in for any reason).
- Set your multimeter to continuity mode (or ohms).
- Test each prong: For a two-prong plug, place one probe into each slot of the plug, and the other probe onto the corresponding wire terminal inside the toaster (where the cord connects to the internal circuitry). For a three-prong plug, you’ll test the live (smaller slot), neutral (larger slot), and ground (round hole) wires individually against their internal connections.
- Look for continuity: You should get a low resistance reading or a beep for each wire. If any wire shows “OL” or no beep, the cord has a break and needs replacement.
Step 3: Inspecting and Testing the Heating Elements
The heating elements are arguably the most crucial components for a toaster’s primary function. They are also prone to breaking due to constant heating and cooling cycles.
- Visual inspection: First, visually inspect the Nichrome wires within the heating elements. Look for any visible breaks, sagging, discoloration, or burnt spots. Sometimes a broken wire is clearly apparent.
- Isolate and test: Each heating element is typically connected at two points. Disconnect the wires leading to the element (if possible without damaging them) to isolate it from the rest of the circuit. Place one multimeter probe on each terminal of a single heating element.
- Interpret readings: A healthy heating element should show a low resistance reading (e.g., between 10-150 ohms, though this varies greatly by toaster wattage and model). If you get an “OL” reading, a “1” on the far left of the display, or no beep, the element is broken and needs replacement. Remember, many toasters have multiple heating elements; test each one individually.
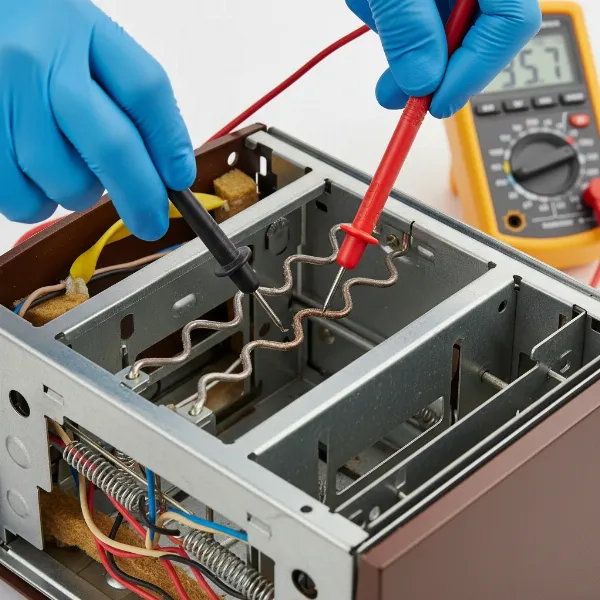 Hands using a multimeter to test a toaster heating element, probes on terminals.
Step 4: Checking the Thermostat and Timer Circuitry
These components regulate the toasting process. While a full functional test might be complex, you can check for basic continuity.
- Thermostat: The thermostat (often a bimetallic strip or a temperature sensor) controls the heating cycle. To test its basic continuity, locate the thermostat and its two connection points. With the toaster cold (and plunger up), place your probes across these points. If it’s a simple bimetallic switch, it should show continuity when cold. Some thermostats might only close the circuit when the plunger is depressed, so you might need to engage the lever for a valid reading.
- Timer/Control Board: If your toaster has a mechanical timer or an electronic control board, checking continuity directly through every part can be challenging. For mechanical timers, check the main switch contacts that are activated when the lever is pressed down. For electronic boards, you’re usually checking the power input and output to key relays or switches. If you’re testing switches, they should show continuity when activated and an open circuit when deactivated.
Step 5: Examining the Solenoid/Latching Mechanism (if applicable)
For toasters that automatically hold down the bread carriage, a solenoid or electromagnet is typically responsible.
- Locate the solenoid: This is usually a small coil of wire positioned near the latch mechanism that holds the carriage down.
- Test the coil: With the toaster unplugged, disconnect the wires leading to the solenoid coil. Place your multimeter probes across the two terminals of the coil. You should get a resistance reading (often in the tens or hundreds of ohms). If you get “OL,” the coil is broken, and the solenoid needs replacing. An “OL” means an open circuit, preventing the electromagnetic field from engaging. If the solenoid has a separate switch, test its continuity as well (closed when lever is down, open when up).
Step 6: Internal Wiring and Connections
Even if major components test fine, a simple broken or loose wire can interrupt the circuit.
- Trace wires: Carefully follow all internal wires, looking for any signs of damage, fraying, or loose connections at terminal blocks or crimps.
- Test point-to-point: If you suspect a break in a specific wire, you can test its continuity by placing one probe at the beginning of the wire and the other at its end, ensuring it’s disconnected from other components.
Interpreting Your Multimeter Readings
Understanding what your multimeter tells you is crucial for accurate diagnosis.
What a Good Continuity Reading Looks Like
When a component has good continuity, it means electricity can flow through it unimpeded. On your multimeter, this typically registers as a low resistance reading, ideally very close to 0 ohms. Many multimeters in continuity mode will also emit an audible beep to signal a complete circuit. This indicates the component is electrically sound.
What an Open Circuit Looks Like
An “open circuit” is the opposite of continuity—there’s a break in the electrical path. If you’re testing a component and the multimeter displays “OL” (Open Loop), a “1” on the far left of the screen with no other digits, or remains silent (no beep in continuity mode), it indicates an open circuit. This component is faulty and cannot conduct electricity, meaning it needs to be replaced.
Identifying Short Circuits (Briefly)
While continuity testing primarily identifies open circuits, it’s worth a brief mention of short circuits. A short occurs when electricity finds an unintended, low-resistance path, often bypassing a load (like a heating element) and drawing excessive current. While a direct continuity test might show extremely low resistance, a short is often identified by a tripped circuit breaker or blown fuse, and sometimes by visible burn marks. It’s a different problem than an open circuit but can also manifest as a “dead” appliance.
Common Continuity-Related Toaster Problems
Based on years of experience, certain issues frequently point to specific continuity problems.
Toaster Not Heating Up
This is perhaps the most common complaint. If your toaster isn’t heating at all, the first suspects are usually the heating elements themselves. A visual inspection often reveals a broken Nichrome wire. If not, a continuity test will quickly confirm if an element has an open circuit. Beyond the elements, a faulty thermostat that isn’t closing its circuit, or a break in the power cord, can also prevent heat generation.
Toaster Not Staying Down
If you press the lever, but the bread carriage immediately springs back up, the problem likely lies with the latching mechanism or the solenoid. The solenoid’s coil might have an open circuit, preventing it from generating the electromagnetic force needed to hold the lever. Alternatively, the switch that activates the solenoid when the lever is depressed might lack continuity.
Toaster Tripping Breakers
While less directly a “continuity” issue in the sense of an open circuit, a toaster repeatedly tripping your home’s circuit breaker or blowing its own internal fuse often suggests a short circuit. This could be due to exposed wires touching metal, internal component failure causing an unintended path for electricity, or even excessive crumb buildup creating a conductive bridge. While continuity testing helps find breaks, diagnosing shorts sometimes requires checking resistance values more closely or inspecting for direct contact between conductors and the toaster’s metal frame.
Repairing and Reassembling Your Toaster
Once you’ve identified the faulty component, the next step is deciding whether to repair or replace it.
When to Repair vs. Replace
The decision to repair or replace often comes down to cost, availability of parts, and your comfort level with DIY repairs. If a simple wire is loose, a quick fix might be all that’s needed. However, if a major component like a heating element or solenoid is broken, you need to weigh the cost of a replacement part against the price of a new toaster. Many modern toasters are designed to be quite inexpensive, making individual component replacement less economical, especially if parts are riveted rather than screwed in.
Proper Reassembly Techniques
If you proceed with a repair, ensure all new parts are identical to the originals in specification. When reassembling, reverse your disassembly steps. Make sure all wires are securely connected, neatly tucked away from moving parts and heat sources, and that no bare wires are exposed. Double-check that all screws are tightened, and the casing fits together snugly. Before plugging in the repaired toaster, give it one final visual inspection to ensure everything is correctly seated and nothing has been pinched or overlooked.
“A common mistake I see technicians make is rushing the reassembly. Taking an extra five minutes to ensure every wire is in place and every connection is solid can prevent a costly, or even dangerous, second repair.” – Johnathan Reed, Master Appliance Repair Technician
Conclusion
Troubleshooting a broken toaster with continuity checks can transform a frustrating situation into a rewarding DIY repair. By understanding the basics of electrical circuits, wielding your multimeter with confidence, and meticulously testing each component, you gain valuable insight into your appliance’s inner workings. From identifying a severed heating element to pinpointing a problematic power cord, you’re now equipped to diagnose and potentially fix many common toaster malfunctions.
Remember, safety is paramount in all electrical work. Always unplug the toaster before you start, and when in doubt, consult a professional. With the right approach, you can extend the life of your toaster, reduce waste, and once again enjoy that perfect slice of toast. What other small appliances are gathering dust in your kitchen that might benefit from a continuity check?
Frequently Asked Questions
What does “no continuity” mean on a multimeter?
“No continuity” on a multimeter indicates an open circuit, meaning there’s a break in the electrical path of the component or wire you’re testing. The multimeter will typically show “OL” (Open Loop), a “1” on the left side of the display, or produce no audible beep, signifying that electricity cannot flow through that part.
Can a faulty power cord cause a toaster to stop working entirely?
Yes, absolutely. A faulty power cord, whether due to internal breaks, frayed wires, or damaged plug prongs, can prevent any electricity from reaching the toaster’s internal components. If the power cord lacks continuity, the entire toaster will remain dead, regardless of the condition of its internal parts.
How do I safely open my toaster to perform tests?
To safely open your toaster, first ensure it is unplugged and cool. Then, typically turn it upside down to locate screws, which are often hidden under rubber feet or plastic covers. Remove these screws carefully, documenting their positions, and gently separate the outer casing to access the internal components for testing.
What is a typical resistance reading for a toaster heating element?
A typical resistance reading for a functioning toaster heating element can vary significantly, often ranging from 10 to 150 ohms. This range depends on the toaster’s wattage and design. A reading of “OL” (open loop) or a significantly higher resistance usually indicates a broken element, while a very low reading might suggest a short.
Is it always worth repairing a broken toaster?
It’s not always worth repairing a broken toaster. The decision depends on the cost of replacement parts, the difficulty of the repair (especially if parts are riveted), and the overall value of the toaster. For very inexpensive models, buying a new one might be more practical than sourcing and replacing a faulty component.